A Simple Natural Way to Use Herbs Topically For You and Your Family
Kitchen Medicine Making is ideal for minor first aid needs such as; scrapes, rashes, cuts, bruises, inflammation, aching joints and more… Making your own homemade oils/salves/ointments is an amazing addition to your home remedy cabinet. They are very economical and last a reasonably long time and are so simple to make. Once you know how, and what plants to use, you will be making them for everyone! DIY can be so addictive! For me simplicity is always the answer. The following recipes are easy and fun to create.
Infused Oils
Infusing oils allows the plants essence and therapeutic benefits to be drawn into an oil that can be applied to the body externally. They store for long periods of time and are fun and economical to make.
What oil should I use?
There are many pressed oils that will work quite nicely! (Expensive cold pressed oils will be wasted on the heating method)
- Olive oil – inexpensive, nourishing, and good for those with nut/seed allergies. It does have a stronger scent, but is my personal favourite for medicinal ointments.
- Sunflower oil – inexpensive and neutral in scent.
- Almond oil – excellent for dry and sensitive skins, light scent. A more expensive choice.
- Grapeseed oil – best for oily skins as it is light and easily absorbed. A more expensive choice.
What herbs should I use?
Here is a short list of some great herbs to try out for the first time. It is such an amazing feeling to go outside and pick fresh plants for your oil. The trick here is to let your herbs wilt first before adding to the oil. Wilting allows some of the water content to dissipate, preventing your oil from going “off” – rancid or moldy.
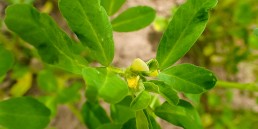
- Calendula petals (Calendula officinalis) – Infuses the oil with a beautiful golden orange colour. Amazing for all types of skin healing, a mild anti-microbial.
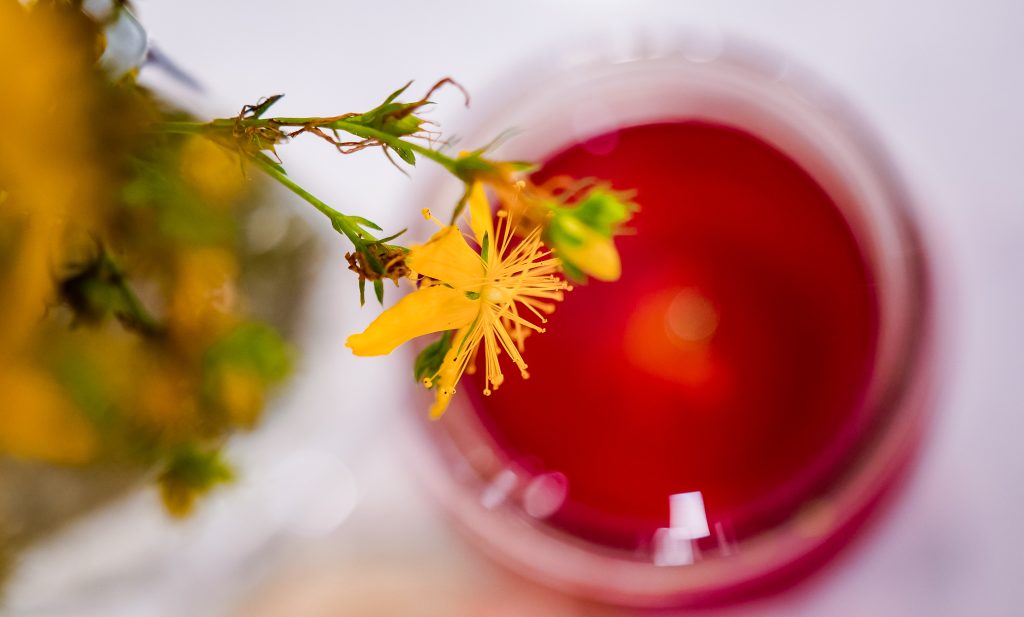
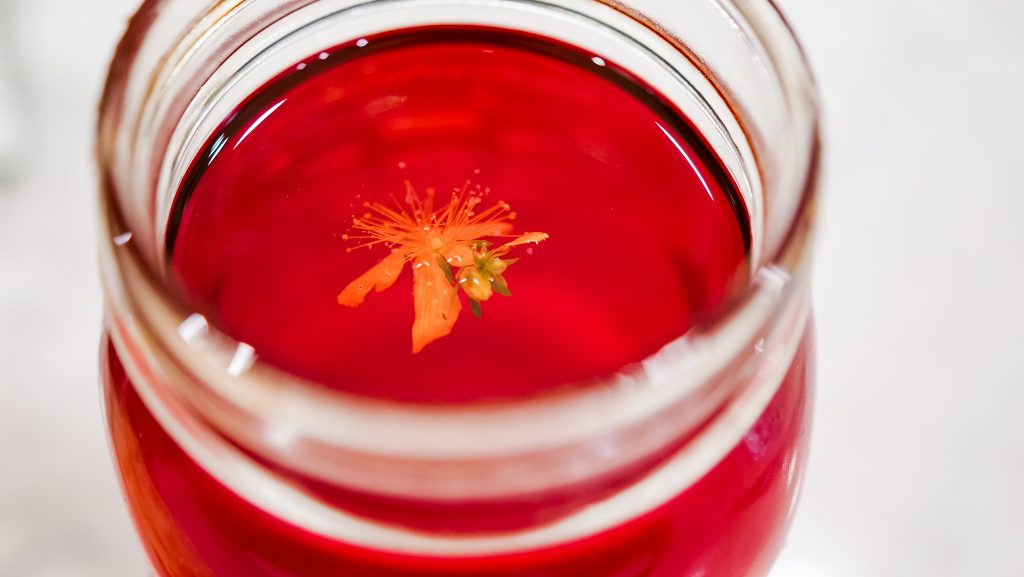
- St. John’s Wort flower (Hypericum perforatum) – Infuses the oil an amazing red colour. This oil has great success with nerve pain and aching joints. It is also an excellent remedy for the pain and scar reduction of minor burns. It is also anti-viral.
- Rose petals (Rosa spp.) – Pink and deliciously scented, great for cosmetic use and for calming & relaxing remedies.
- Comfrey (Symphytum officinale L.) – Sometimes called knitbone, this amazing green salve has been used traditionally to support superficial wounds, breaks, sprains, bruises, sprains & strains.
- Chickweed (Stellaria media) – Another lovely green salve which offers soothing relief to hot rashes, bug bites, wounds, diaper rash or any type of itchy skin condition.
- Plantain (Plantago) – This healing green salve aids in stings, bug bites, minor wounds, scratches, rashes and dry, irritated skin.
- Goldenrod (Solidago) – Is used topically for muscle cramps and sore muscles. Bonus: can be use to make salad dressing.
How do I infuse my Oil?
Traditional Sun method: my favourite!
This is such a simple way to make your oil! It is also the oldest and highest regarded way to make your infused oil. Simply fill a clear, wide mouthed jar ½ to ¾ with chopped herb, then top with oil. Shake gently to be rid of any air bubbles and ensure all herbs are covered with oil. Steep in sunny window or outside in the full sun, for approximate four – six weeks, shaking gently each day. Strain and pour into a sterilized storage jar and keep in a cool dark cupboard. Don’t forget to label and date!
Note: There are also Quick Pan and Slow Cooker methods if the infused oil is required quicker.
How Do I Make a Salve/Ointment?
Once you have your beautiful solar infused oil you are ready to make your salve… Now this is the magical part!
Take one cup of your infused oil and ¼ cup of beeswax; add to a stainless steel pot and place on burner. Heat low and slow until all the beeswax has melted. Test consistency of salve by taking a spoon full and placing in the freezer for ~5 min. If salve is too hard you can simply add a titch more infused oil to the pan, if too soft simply add a titch more beeswax to pan and melt. Your salve is now ready to pour into sterilized jars and let cool.
Voila! You have made your first salve – Whoot! Whoot!
Photos provided by Serena Mor